As an Amazon Associate I earn from qualifying purchases.
This post contains affiliate links.
Surfing enthusiasts understand the significance of proper surfboard storage. Storing boards horizontally can occupy substantial space and risk damage. A vertical surfboard rack offers an efficient solution, maximizing space while maintaining the integrity of your beloved boards. Whether you’re a seasoned surfer or a novice catching your first wave, knowing how to build a vertical surfboard rack is a valuable skill.

In this guide, we’ll delve into the step-by-step process to build your own vertical surfboard rack, tailored to your needs and space constraints. From selecting the right materials to assembling the rack securely, we’ll cover everything you need to know. By the end, you’ll not only have a functional storage solution but also a sense of accomplishment in creating something practical with your own hands. Let’s dive in and explore the art of building a vertical surfboard rack to safeguard your boards and streamline your surfing adventures.
Understanding the Importance of a Vertical Surfboard Rack:
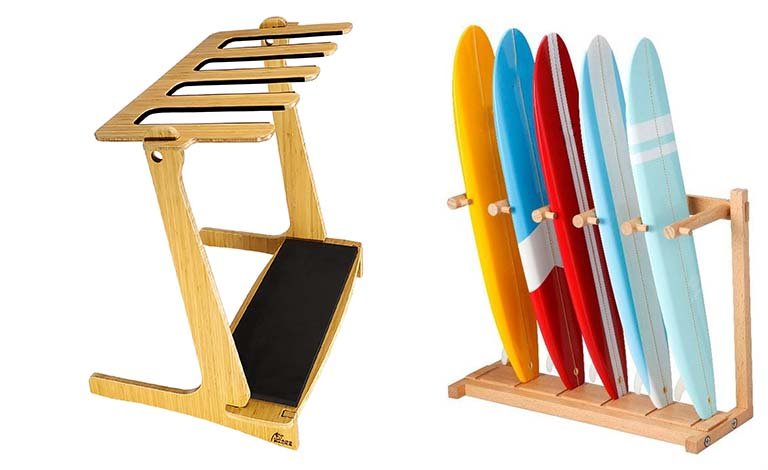
Surfboards are not only valuable investments but also cherished possessions for surfers. Proper storage not only prolongs their lifespan but also keeps them organized and readily accessible. A vertical surfboard rack is an excellent choice for those looking to maximize space while showcasing their boards in a visually appealing manner. By mounting the boards vertically, you can save valuable floor space and create a striking display that celebrates your passion for surfing.
Materials Needed:
Before diving into the construction process, gather the following materials:

- Wood planks (preferably weather-resistant)
- Screws
- Drill
- Saw
- Sandpaper
- Level
- Tape measure
- Pencil
- Paint or wood stain (optional)
- Brush or roller
Step-by-Step Guide to Building a Vertical Surfboard Rack:
Measure and Cut the Wood:
Begin by measuring and marking the dimensions for your surfboard rack on the wood planks. The dimensions will vary depending on the number of surfboards you wish to store and the available space.
Use a saw to carefully cut the wood according to your measurements. It’s essential to ensure precise cuts to guarantee stability and aesthetics.
Sand the Wood:
After cutting the wood, use sandpaper to smooth out any rough edges or surfaces. This step is crucial for achieving a professional finish and preventing splinters.
Assemble the Rack Frame:
Lay out the wood planks according to your design, forming the frame of the surfboard rack. Use a level to ensure that the structure is even and balanced.
Once satisfied with the arrangement, use screws to securely attach the planks together, forming the frame of the rack. Be sure to pre-drill holes to prevent splitting the wood.
Install Support Brackets:
To provide additional support for the surfboards, install support brackets inside the frame at regular intervals. These brackets will help distribute the weight of the boards evenly and prevent them from sagging.
Use screws to attach the brackets securely to the frame, ensuring they are level and properly aligned.
Mount the Rack Vertically:
With the rack fully assembled, it’s time to mount it vertically onto the desired wall or surface. Choose a location that is sturdy enough to support the weight of the surfboards.
Use a drill to attach the rack securely to the wall, making sure to use appropriate anchors or screws for the surface type (e.g., drywall, wood, concrete).
Expert Tips for a Successful Build:
Prioritize Safety:
Always wear protective gear such as goggles and gloves when working with power tools and sharp objects.
Choose Quality Materials:
Opt for durable, weather-resistant wood to ensure the longevity of your surfboard rack, especially if it will be exposed to outdoor elements.
Customize to Fit Your Needs:
Feel free to adjust the dimensions and design of the rack to accommodate your specific surfboard collection and space constraints.
Add Personal Touches:
Consider painting or staining the rack to match your decor or adding hooks for storing accessories such as wetsuits or leashes.
In conclusion, mastering the art of building a vertical surfboard rack is not only a practical endeavor but also a rewarding one. By following the steps outlined in this guide, you can create a customized storage solution that maximizes space and protects your cherished surfboards. Remember to prioritize stability and durability during the construction process to ensure the safety of your boards. With your newly built rack in place, you’ll have peace of mind knowing that your surfboards are stored securely, ready for your next adventure on the waves. Embrace the DIY spirit and enjoy the convenience of your homemade vertical surfboard rack.
Related Articles:
- Best Vertical Surfboard Rack
- Best Soft Roof Racks for Surfboards
- best surfboard wall racks
- Best Surfboard Rack for Bike
- To Build a Surfboard Wall Rack
- To Build a Horizontal Surfboard Rack
As an Amazon Associate I earn from qualifying purchases.
Leave a Reply